Walkthrough of Configuration - Initial Setup
This document will walk you through the process of configuring machines on a DCM using the Configuration program software. This document will not cover everything included in the Configuration program, only the initial setup. We will walk through the 'Shop Floor', 'Sets', and 'Groups' sections of the program.
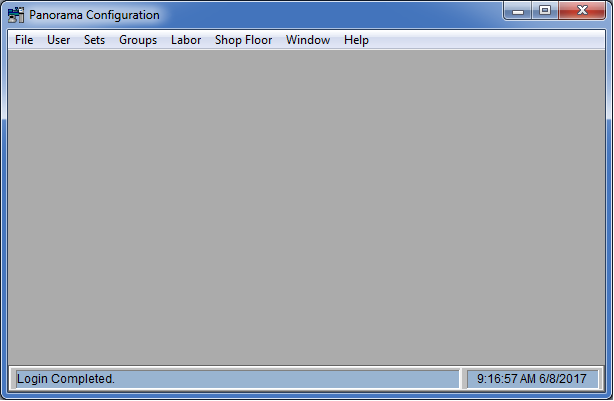
To begin, launch the Configuration program. This will bring you to the login screen.
NOTE: In order to configure the machines on a DCM, you must have the IP address of the host server in your Panorama.ini file and make sure it is not commented out.

Once logged in, you will be brought to the main screen of the Configuration program.
Comm Processor Setup
'Comm Processor' will be found in the 'Shop Floor' tab at the top of the screen. Each Comm Processor will have a DCM assigned to it in the next step. Click the 'New' button to create a new entry.
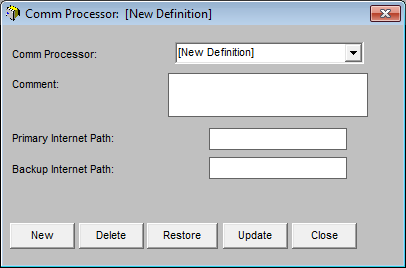
Comm Processor: This will be the name you assign to the Comm Processor.
Comment: (Optional) Any notes or details about the Comm Processor may be entered here.
Primary Internet Path: This will be the IP address of the DCM the that will be assigned to the Comm Processor.
Backup Internet Path: This will be the same as the Primary Internet Path.
Once you have finished the entry, click the 'Update' button to complete. This message will appear:
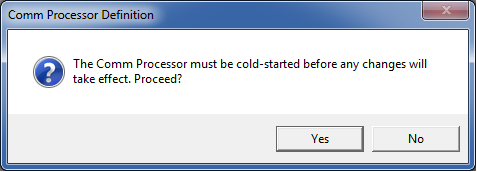
Click 'Yes' to proceed.
DCM Setup
'DCM Setup' will be found in the 'Shop Floor' tab at the top of the screen. The properties will vary from customer to customer, and from DCM to DCM, depending on the specified requirements. Click the 'New' button to create a new entry.
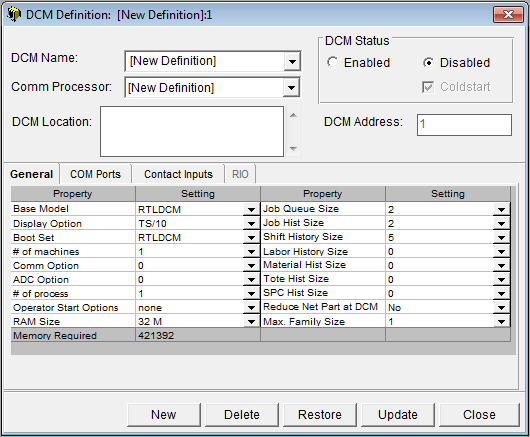
DCM Name: This will be the name you assign to the DCM.
Comm Processor: This is where you will choose the Comm Processor that the DCM will be assigned to. The IP address of the DCM must match the internet path of the Comm Processor. Only one DCM will be on each Comm Processor.
DCM Location: (Optional) The location of the DCM may be entered here.
DCM Status: There are three options, labeled 'Enabled', 'Disabled', and 'Coldstart'. To begin, the 'Disabled' and 'Coldstart' options will be checked. You may leave them as such for now, and come back to this at the end of the configuration.
DCM Address: (Optional) You may enter the address of the DCM here.
Tabs - General, COM Ports, Contact Inputs
In these tabs, you will set the properties of the DCM. These will be determined by the customer, based on the requirements specific to the purpose of the DCM.
Once you have finished the entry, click the 'Update' button to complete.
Down Sets
'Down Sets' will be found in the 'Sets' tab at the top of the screen. Click the 'New' button to create a new entry.

Down Set Name: This will be the name you assign to the Down Set.
Comment: (Optional) Any notes or details about the Down Set may be entered here.
Reason List: This is where you will define the various reasons the machine may go into 'Down' mode. In the four columns to the left of each reason, you may set actions to be taken when the reason is assigned to the 'Down' machine. You may have as many or as few reasons defined as is necessary, up to the quantity allowed.
Once you have finished the entry, click the 'Update' button to complete.
Assist Sets
'Assist Sets' will be found in the 'Sets' tab at the top of the screen. Click the 'New' button to create a new entry.
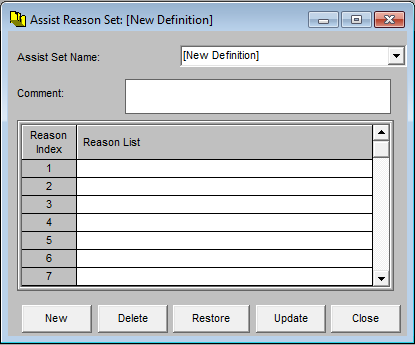
Assist Set Name: This will be the name you assign to the Assist Set.
Comment: (Optional) Any notes or details about the Assist Set may be entered here.
Reason List: This is where you may define the various reasons the machine may go into 'Assist' mode. You may have as many or as few reasons defined as are necessary, up to the quantity allowed.
Once you have finished the entry, click the 'Update' button to complete.
Reject Sets
'Reject Sets' will be found in the 'Sets' tab at the top of the screen. Click the 'New' button to create a new entry.
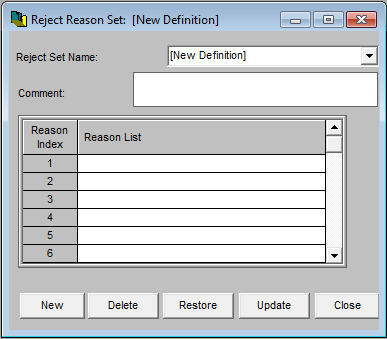
Reject Set Name: This will be the name you assign to the Reject Set.
Comment: (Optional) Any notes or details about the Reject Set may be entered here.
Reason List: This is where you will define the various reasons the machine may reject parts. You may have as many or as few reasons defined as are necessary, up to the quantity allowed.
Once you have finished the entry, click the 'Update' button to complete.
Work Center Setup
'Work Center Setup' will be found in the 'Groups' tab at the top of the screen. Click the 'New' button to create a new entry.
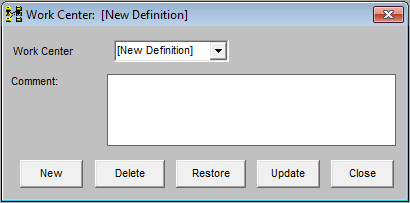
Work Center: This will be the name you assign to this Work Center.
Comment: (Optional) Any notes or details about the Work Center may be entered here.
Once you have finished the entry, click the 'Update' button to complete.
Machine Setup
'Machine Setup' will be found in the 'Shop Floor' tab at the top of the screen. Click the 'New' button to create a new entry.
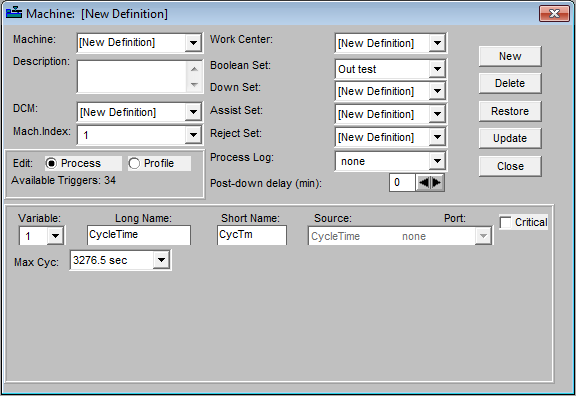
Machine: This will be the name you assign to the machine.
Description: (Optional) Any notes or details about the machine may be entered here.
DCM: This is where you will choose the DCM the machine will be assigned to.
Mach. Index: This is where you will choose the input the machine will be connected to on the DCM.
Work Center: This is where you will choose the work center the machine will be assigned to.
Boolean Set: This is where you will choose the boolean for the machine.
Down Set: This is where you will choose the Down Set for the machine.
Assist Set: This is where you will choose the Assist Set for the machine.
Reject Set: This is where you will choose the Reject Set for the machine.
Process Log: (Optional) This is where you may choose a Process Log for the machine.
Post-down delay (min): (Optional) This is where you may choose the post-down delay for the machine.
Process variables - Variable, Long Name, Short Name, Source, Port, Max Cyc.
Process variables may be created in the bottom half of the Machine Setup entry. In order to create process variables, the 'PVAR' option must be activated on the host server, and the number of processes must be chosen in the DCM Setup under the 'General' tab.
Once you have finished filling in all of the required boxes, click the 'Update' button to complete the entry.
Display Group Setup
'Display Group Setup' will be found in the 'Groups' tab at the top of the screen. Click the 'New' button to create a new entry.
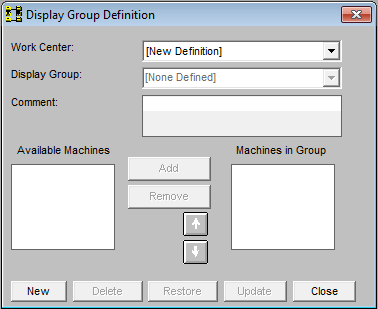
Work Center: This will have a drop-down that will show the Work Centers that have been created. You will choose the Work Center that will be displayed in the group you are creating.
Display Group: This will be the name you assign to the Display Group.
Available Machines: This will show all of the machines of the chosen Work Center that are available to add to the Display Group. To add a machine, simply click the machine name to highlight it, then click the button labeled 'Add'.
Machines in Group: This will show all of the machines currently in the Display Group. To remove a machine, simply click the machine name to highlight it, then click the button labeled 'Remove'.
Once you have finished adding all the machines you wish to add to the Display Group, click the 'Update' button to complete the entry.
Enable the DCM
At this point, you will go back to the DCM Setup under the tab labeled 'Shop Floor' at the top of the main page. Under 'DCM Status' in the top right corner of the entry, you will click the circle labeled 'Enabled' to make the DCM available for job assignments and display.