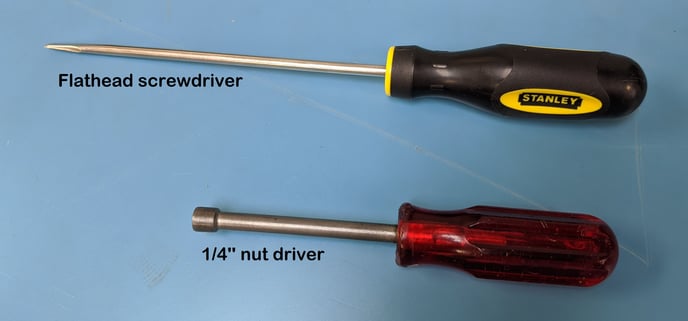
Tools needed to complete this task:
1/4 inch nut driver
small flathead screwdriver
Step 1: Place the DCM on a surface with enough room to open the DCM lid and also have room for tools and various parts.
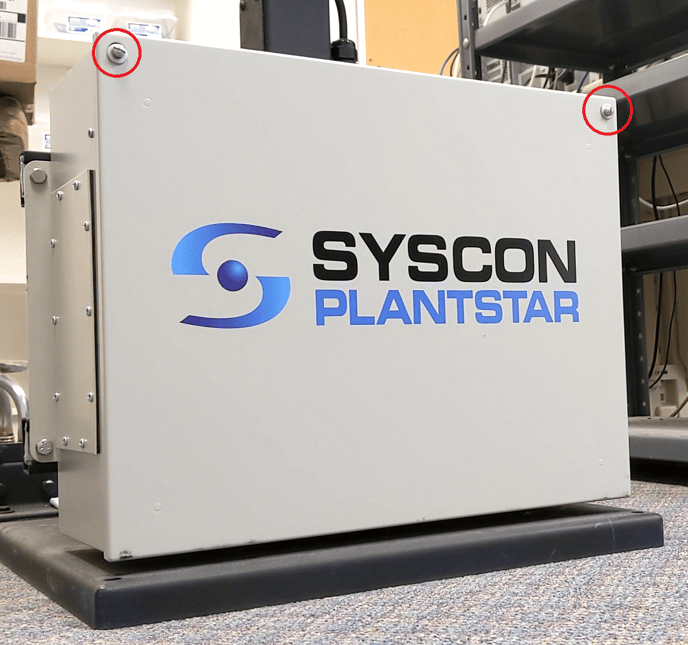
Step 2: Open up the DCM by un-screwing the 2 screws on the DCM lid, shown circled in red below. Your DCM may vary in appearance but the location of the screws is the same.Step 3: Lay the lid of the DCM down flat.
.jpg?width=688&name=03%20Open%20DCM%20(Circled).jpg)
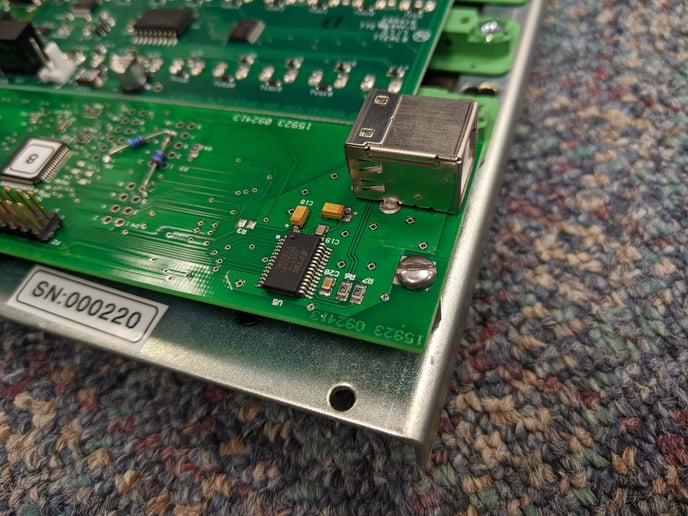
Step 3: Disconnect the USB cable from the IO card (circled in red above). Remove the 4 nuts holding the IO rack and the nut that holds the green ground cable to the IO rack and place them somewhere safe.
Step 4: Take the IO rack off the mounting studs and carefully remove the 2 power connectors located on the back of the rack (circled below).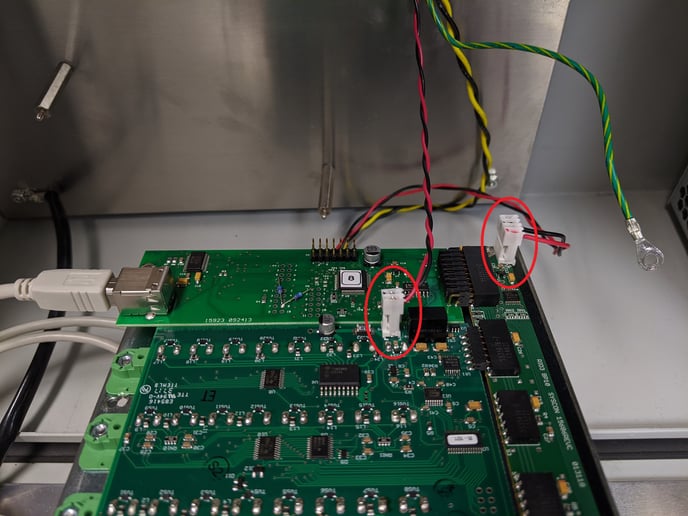
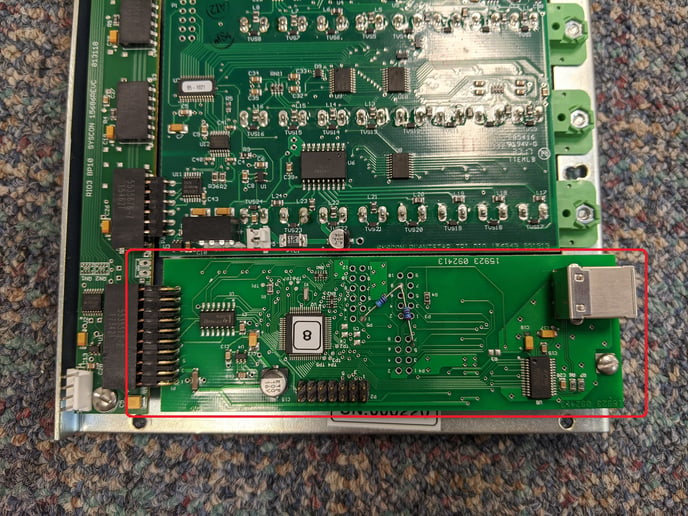
Step 5: The USB card is the one circled in red in the next photo. This is what you will be disconnecting and replacing.
Step 6: Remove the single screw holding the USB board to the IO rack.
Step 7: Gently wiggle the USB board while pulling it out of the backplane (the pin socket). The board should easily come free. Be careful not to damage the pins on the board.
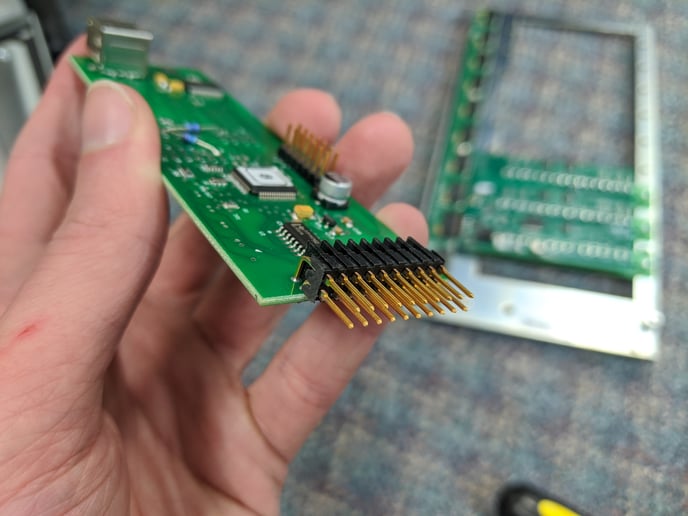
Step 8: Install the new USB board into the same location as the old one, being careful to ensure that the pins are lined up with the socket exactly. Reinstall the screw that held the previous board to the rack.
Step 9: Reverse the instructions to reinstall the IO rack back into the DCM. Be careful not to over-tighten the nuts that hold the IO rack onto the posts on the DCM. Gently snug them.
Make sure that all power and other (USB) cables are re-attached and power on the DCM when ready. This completes the USB board replacement process.