The PlantStar Process Journal program is a web-based program designed to provide the shop floor personnel with a method to record changes made to a process being monitored by the PlantStar system. These instructions are designed to provide an overview of the Process Journal program and how to view and create Process Journal tickets. Screen shots are used for clarity.
Each record entered through the Process Journal program will from this point forward be referred to as a ticket. The operator creates a ticket to record a particular event. Tickets can be individual, standalone objects or they can be linked to other, related tickets. All menus and buttons on the Process Journal screens have been designed for easy use by operators working on touch screens with gloved hands.
The administration screens are intended to be accessed by a limited group of people. Only those user accounts that have full Administer PlantStar privileges will be able to login to these screens. These screens give the user the ability to modify and delete Process Journal tickets from the database, as well as add and remove detailed reasons from the addition reason sets.
- Login
The login screen for the administrative functions can be reached by clicking the

“Admin” button on the standard menubar that appears on every Process Journal screen.
Once you have reached the login screen, enter a userid and password of an account that has Administer PlantStar privileges. Once successful, you will be taken to the main page of the administration functions. After you have logged in your connection will timeout after one hour of inactivity. If you leave the administration pages and return more than an hour later you will need to login again. However, your account will not logout as long as you are accessing the administration pages more than once an hour.
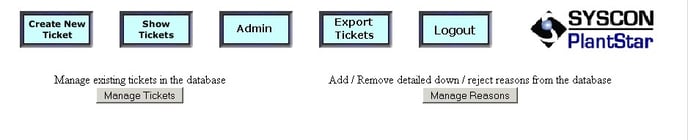
As you can see from this page, the administration functions are broken down into two main categories: Manage Tickets and Manage Reasons. If you are working in either of these two sections and wish to return to this main menu, clicking the “Admin” button in the menubar will return you to this location.
- Manage Tickets
Process Journals tickets are classified into two categories: standalone and linked. Standalone tickets are created through the standard ticket creation process. A standalone ticket describes a single problem, including the job and machine information as well as the corrective action taken. It is not associated with any other tickets in the database. A linked ticket is a ticket that is related to other tickets in the system. Linked tickets are used to describe an ongoing problem. For example, an operator creates a ticket for a reject problem on a machine, describing the action taken to correct the problem. In the event that the corrective action described did not eliminate the problem, a second ticket can be created describing the new corrective action and this new ticket can be linked to the original ticket. This provides a method to track ongoing problems and the methods used to fix the problem.
The image below shows the Manage Tickets screen. Pay close attention to the first two columns in the output. Linked tickets will have a unique value in the "Ticket Number" column and the value in the "Child" field will always be zero. Linked tickets will share the same value in the "Ticket Number" field and the value in the "Child" field will increment with
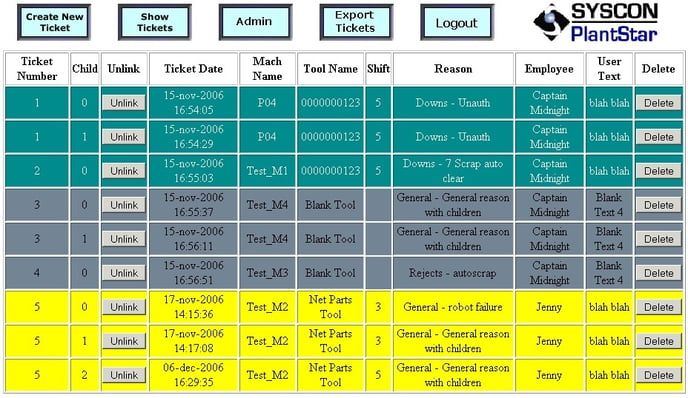
each linked ticket.
The Manage Tickets screen displays all of the tickets that exist in the database. From this page you have the ability to unlink linked tickets or delete them from the database entirely. A group of linked tickets all share the same ticket number, but the child value in the next column will vary with each linked ticket. In the screenshot above, ticket number 5 has one child ticket linked to it. The first ticket that was created was child 0 and the tickets with child number 1 and 2 were created at a later time. If you choose to unlink a child that is linked to another ticket, your choice will be confirmed and the ticket will be unlinked.
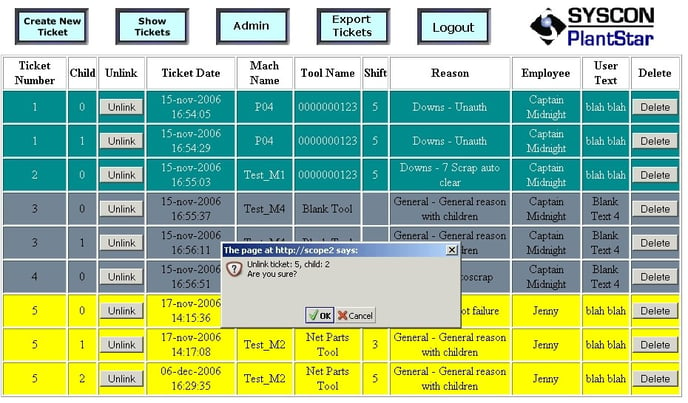
In this example we have chosen to unlink child 2 of ticket 5. Clicking OK in the dialog box will unlink the ticket, clicking Cancel will make no changes to the database. The image below is the end result of the unlink operation. Because unlinking a child ticket does not change the status of any other tickets on the system, this is a relatively straightforward operation.

As you can see, the ticket that used to be child 2 of ticket 5 is now child 0 of ticket 6. What started out as a child of another ticket is now a separate standalone ticket without any links to other tickets in the database. Now we will try and unlink a parent ticket that has other tickets linked to it.
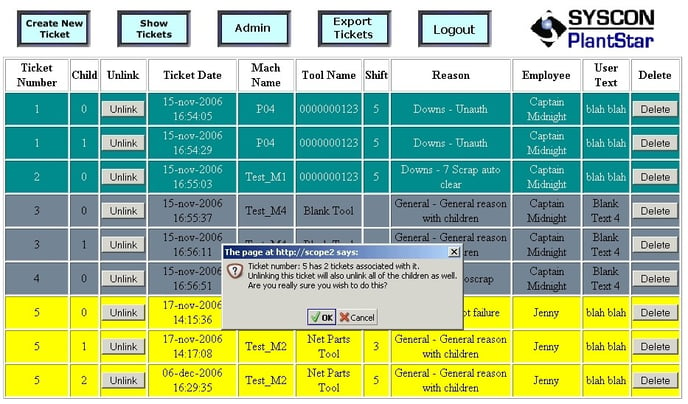 In this case we have chosen to unlink child 0 of ticket 5. Because there are two other tickets that are linked to this ticket, the confirm dialog warns us of the effects that this will have on the other tickets. When we click OK in this case the changes are more widespread.

After the operation is completed what used to be three linked tickets are now three standalone tickets that are not associated with any of the others in the system. As there is no way to relink tickets that have been unlinked, it is advisable to be proceed carefully when unlinking tickets.
III. Manage Reasons
Process Journals makes use of the standard reason categories and sets as defined in PlantStar config, including Down, Profile, PVAR and Reject. Process Journals adds another level of detail to these reasons. Each reason in a particular set can have additional detailed reasons assigned to it. In addition to the standard categories, a General category is included that is only available through the Process Journal screens. This enables the definitions of reasons that do not fit in any of the other available categories.
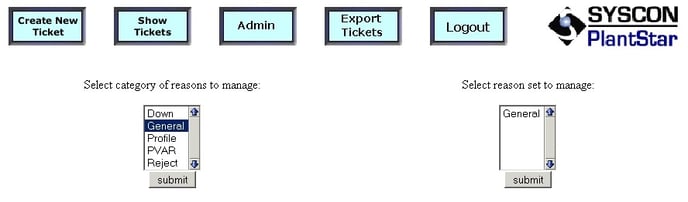
In order to define detailed reasons, start from the main Admin page and select the "Manage Reasons" button. This will take you to a menu that lists the available categories as
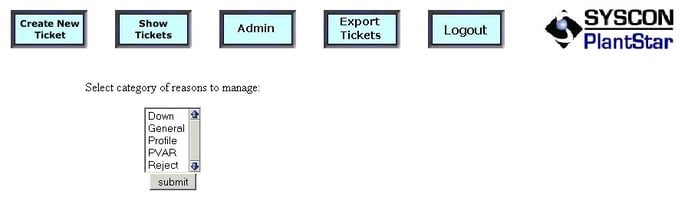
seen below.
As you can see, all the available categories are listed in the menu. Selecting any of these categories will result in a display of all the sets that are defined under that category. In this example we have selected the Profile category, the result of which is a list of the profile sets defined on the shop floor.
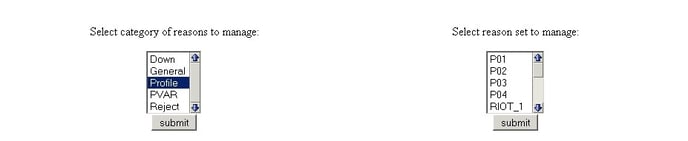
In this case we select P01 from the menu and click the "Submit" button. This gives us a list of reasons defined in the P01 profile set.
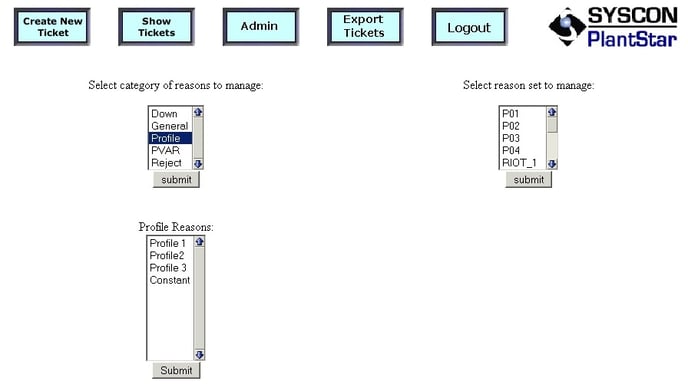
To see the list of detailed reasons associated with a particular profile reason, select it and choose submit.
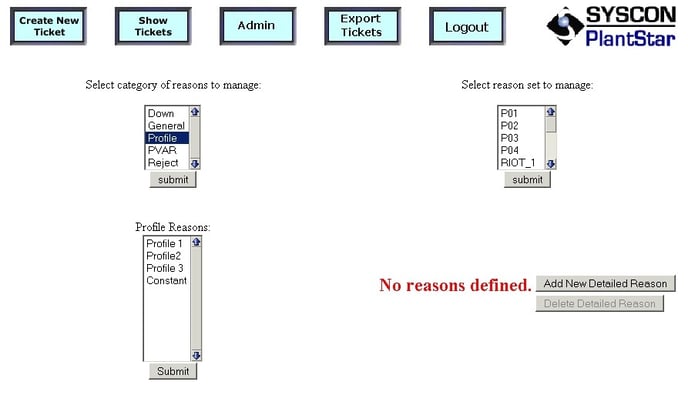
Since no detailed reasons have been defined and assigned to the reason selected, we see a message informing us of the situation and the "Add New Detailed Reason" button. To define a new detailed reason, click on the "Add New Detailed Reason Button" button and enter the name of the new reason in the popup dialog box.

Once one or more detailed reasons have been defined for a particular reason, you will see a menu of detailed reasons in place of the message that appeared there previously. In this example, four detailed reasons have been defined and we now have the option of adding more detailed reasons or deleting existing detailed reasons.

Once there are detailed reasons defined you also have the option of deleting reasons that you no longer want the operators to use. Just select the detailed reason to be deleted and click the "Delete Reason" button. Click "OK" in the dialog box that pops up and the detailed reason will be deleted. Use this option with caution. If you delete a detailed reason, any ticket that has been created using that reason will now be incomplete.
Now that these detailed reasons have been defined, they are immediately available for use. When an operator creates a new ticket and selects Profile for P01 and then chooses the reason "Profile 1" from the list of reasons, these detailed reasons will also be available for them to select from. This additional information will be included with the ticket when it is saved to the database. The standard categories: Down, Profile, PVAR and Reject all work in this manner. You can associate detailed reasons with each reason in the sets defined. However, you cannot alter or define the sets or reasons. Those changes must be made through the standard PlantStar config program.
The General category that is specific to Process Journals has more flexibility than the other categories. In the General category you are not limited to defining detailed reasons. You also have to define the less specific reasons that the detailed reasons are associated with.
There is only one reason set defined under the General category. Because this reason set is only used by Process Journals, by default there are no reasons defined in the set. These reasons must be added to the set just like the detailed reasons. Initially, when you select the General reason set you will see the message below.
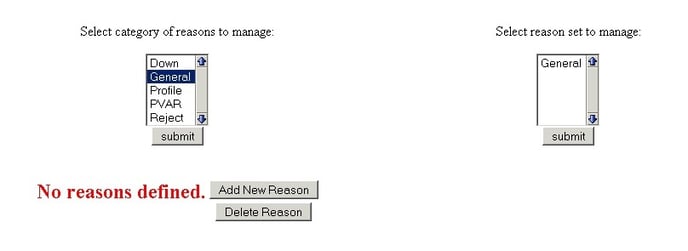
General reasons are defined in the same manner as detailed reasons are defined in the other reason categories. Click the "Add New Reason" button and enter in the description of the reason you wish to define and choose "OK." Defined reasons in the General set can also be deleted, but keep in mind that just like the detailed reasons in other sets, if you delete reasons that have been used in tickets, you will be removing useful information from those tickets.
Each reason you define can also have detailed reasons associated with it, just like the other categories. The General category and all reasons you define under this category are available to all operators on all machines for use in the ticket creation process.
- User Screen Configuration
There are several options that can be set for each machine that will be accessing process journal screens. In order to configure a machine, point the browser to the first page of the ticket creation process by clicking the "Create New Ticket" button on the Show Tickets page.

The set display groups allows the selection of a defined display group to be used as the default any time that this particular browser loads the default display group that will always be used whenever the browser loads the ticket creation page.
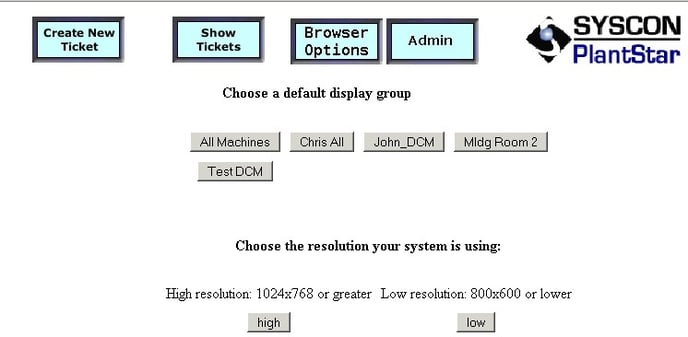
The top half of this page displays all of the display groups defined in Plantstar. By selecting one of these display groups, the next time the browser starts the ticket creation process, only the machines defined in the selected display group will be displayed. This effectively allows the administrator to limit the machines that a particular browser / dcm can create tickets for.
In the event that the operator needs to create a ticket for a machine that is not part of the display group, the "Show All Machines" button is available to revert the display back to the default of all machines.